1.
Install the VAS software
2.
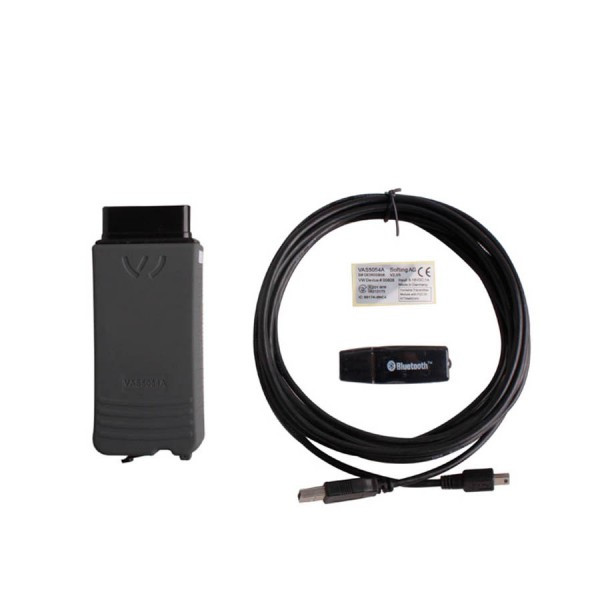
The VAS 5054A is connected to the vehicle
3.
Adjust the Bluetooth security settings and install VAS 5054A is connected via
USB
5.
Change the VAS 5054A Bluetooth password
6.
establish a connection to the VAS 5054A
7.
Install the VAS 5054A for Bluetooth applications
8.
Check the EDIC software configuration settings
9.
Optional: The repair shop tester or diagnostic laptop by the VAS 5055 VAS 5054A
into operation mode.
1.1
Installation VAS-PC software
Do
not connect your VAS 5054A via USB. First install VAS-PC software.
1.2
The VAS 5054 A connection to the vehicle
After
insertion into the diagnostic socket of the vehicle, VAS 5054A will be powered
and ready to work. Blue status indicator on the front side of the radio in
seconds beat flashes.
Connection
CVAS 5054A and diagnostic device can be wirelessly via Bluetooth or via USB
cable. After the diagnosis means for establishing a communication, the status
indicator will remain lit. When via Bluetooth or USB for data exchange, the
status indicator will blink according to the amount of data transmission.
Description Information - connected via USB just for some special situations
prepared, for example, a wireless transceiver configuration. For normal load in
the garage area of automotive diagnostic
generated, USB cable connection does not apply.
1.3
Adjusting Bluetooth security settings
In
order to prevent external unauthorized access to diagnostic equipment, for
security reasons, be sure to make the following settings in the Bluetooth
software.
Open
the entry Bluetooth-Ger & auml in the Control Panel; te (Bluetooth device).
For safety reasons, should the regional Verbindungen (connection) in Tab
Optionen (Options) is set in the disable Bluetooth-Ger & auml; te k &
ouml; nnen eine Verbindung mit
Ldiesem
Computer herstellen (allows Bluetooth devices to connect to this computer).
Recommend activating set BluetoothSymbol im Infobereich anzeigen (show the
Bluetooth icon in the notification area). Then, the Bluetooth icon will continue
to appear in the information area of the
taskbar.
1.4
connection and installation via USB VAS 5054A
To
be described in the following sections Bluetooth password changes, you must
first install the VAS 5054A via USB.
The
following applications need to connect to the VAS 5054A via USB cable
Through
the program Diagnostic Interface Configuration Utility (diagnostic interface
configuration tool) (Bluetooth settings, activating the buzzer installed
automatically shut itself down) to configure the VAS 5054A.
Short-term
use in the region do not allow radio operation. To connect the region continue
to use in the repair plant via USB, then another diagnostic interface VAS 5055
available.
Requirements
and have particularly efficient vehicle connected applications, a short,
careful use (updated programming for example).
The
VAS 5054A is connected to the diagnostic socket. Open the front side of the VAS
5054A rubber cover and insert the attached USB cable Mini-USB plug. The USB
cable with the VAS 5052A is a USB interface. Windows recognizes the VAS 5054A
through Plug and Play mechanism. New Hardware Installation Wizard starts
automatically (see Figure 1-2). For the question of whether to establish a
connection with the problem Windows Update, please select Nein, diesmal nicht
(No, not this). Press Weiter> (Next) to continue.
As
a mode of operation, select Software automatisch installieren (automatic
installation software), and click Weiter> Next). Press Fertig stellen
(Complete) to exit the wizard.
Is
now set up on your computer, you can connect the VAS 5054A via USB.
Bluetooth
1.5 Change Password
Upon
delivery of VAS 5054A Bluetooth device password preprogrammed nine-digit serial
number.
Change
the default Bluetooth password
Your
VAS 5054A is connected to the VAS 5052A / VAS 6150 via USB. By double-clicking
the icon on the Windows desktop, start the configuration program Diagnostic
Interface Configuration Utility (diagnostic interface configuration tool). If
you want to learn how to use the program via Bluetooth, please read above 1.1
parts. Bluetooth parameters area, in accordance with the public's input to the
password field in a new password: it must be at least 6, and is composed of
letters and numbers. You can also use special characters.
Ensure
the security mode is set to 4.
Press
OK (OK) to accept the changes. When you install VAS 5054A via Bluetooth,
Windows Bluetooth software will ask you to enter a new password later - where
it is known as the master key.
1.6
to establish a connection to the VAS 5054A
1.
Open the entry Bluetooth-Ger & auml in the Control Panel; te (Bluetooth
device). Te (equipment), you can find Bluetooth devices within operating range;
in tab Ger & auml. Please note, VAS 5054A must be connected to the
diagnostic socket of the vehicle to be able to be powered. Click Hinzufügen ...
(Add ...). Mark Ger & auml in the following dialog; t ist eingerichtet und
kann erkannt werden (the device is set up and ready, you can find), and then
press Weiter (Next) to continue.
2.
The wizard searches for Bluetooth devices within operating range. Equipment
found will be displayed. Select the VAS 5054A, and click Weiter (Next).
If
your VAS 5054A is not listed in the list, check, VAS 5054A plugged into the
vehicle through the diagnostic connector and access to electricity (the VAS
5054A USB port next to the status indicator flashing), VAS 5054A is within the
operating range ( Distance between VAS 5054A diagnostic devices and should not
more than 10 meters), VAS 5054A is not connected via USB and diagnostic
equipment, VAS 5054A is not being connected to another computer via Bluetooth
(can be identified by the irregular blinking LED.
Click
Erneut suchen (search again).
1.7
install VAS 5054A for Bluetooth connection
If
the VAS 5054A or VAS 5055 has a connection with your repair shop tester or
diagnostic laptop via USB, then disconnect the USB connection. By
double-clicking the icon to start the program on your Windows desktop EDIC
Hardware Installation (EDIC Hardware Installation) After the new installation,
initially in the EDIC hardware installation window does not appear in the
interface. If the basis for CD update, put the lists might have been previously
installed interface. In this case, the interface is the serial number given
check whether you want to install, and COM port given is correct. Otherwise,
the entry should be removed by RemoveEDIC (delete EDIC). With attached
Plus
USB interface is automatically deleted after disconnecting the USB connection.
If the diagnostic interface is not installed, then click the button Add EDIC
(add EDIC), select the entry VAS 5054, and click OK (OK).
Ensure
VAS 5054A Bluetooth software is properly configured, and the role of diagnostic
devices within the distance. Click OK (OK).
Select
assigned by the Bluetooth software to the VAS 5054A COM interfaces. Press OK
(OK) to confirm.
After
the successful installation of the display interface, and at the same time
indicating the serial number and the use of COM ports.
1.8
EDIC software configuration settings;
In
this step will EDIC software configuration settings. VAS 5054A must be
installed.
After
replacing VAS 5055 or VAS 5054A, must be re-set EDIC Software Configuration.
The
VAS 5054A is connected to the vehicle diagnostic socket. VAS 6150 on the
Windows desktop, double-click the desktop icon to start the program EDIC
Software Configuration (EDIC Software Configuration).
No comments:
Post a Comment